After sitting on a shelf in the shop for about 10 years, it was time to do something with this. The newspaper that the pendulum is wrapped in, which is sitting in the clock pillars had a 2006 date on it which is how I came up with the 10 years.
Although the typical anniversary clock will run for a year between windings, this clock only runs a month. Since it is a torsion spring clock it is still put in the same category.
This clock is pre WW 1 dating to 1910. Being over 100 it was pretty tarnished and something had to be done. Being the purist that I am, I'm all for leaving things original but when they look like this, you just don't even want to look at them. It's like having that rare 65 mustang sitting all rusty in a field and thinking you will ruin it's value if you restore it. Well you won't. If the original maker of the clock were alive today, he would be the first to say clean me up. At least I did all of the cleaning and polishing by hand which makes me feel like less of a sinner.


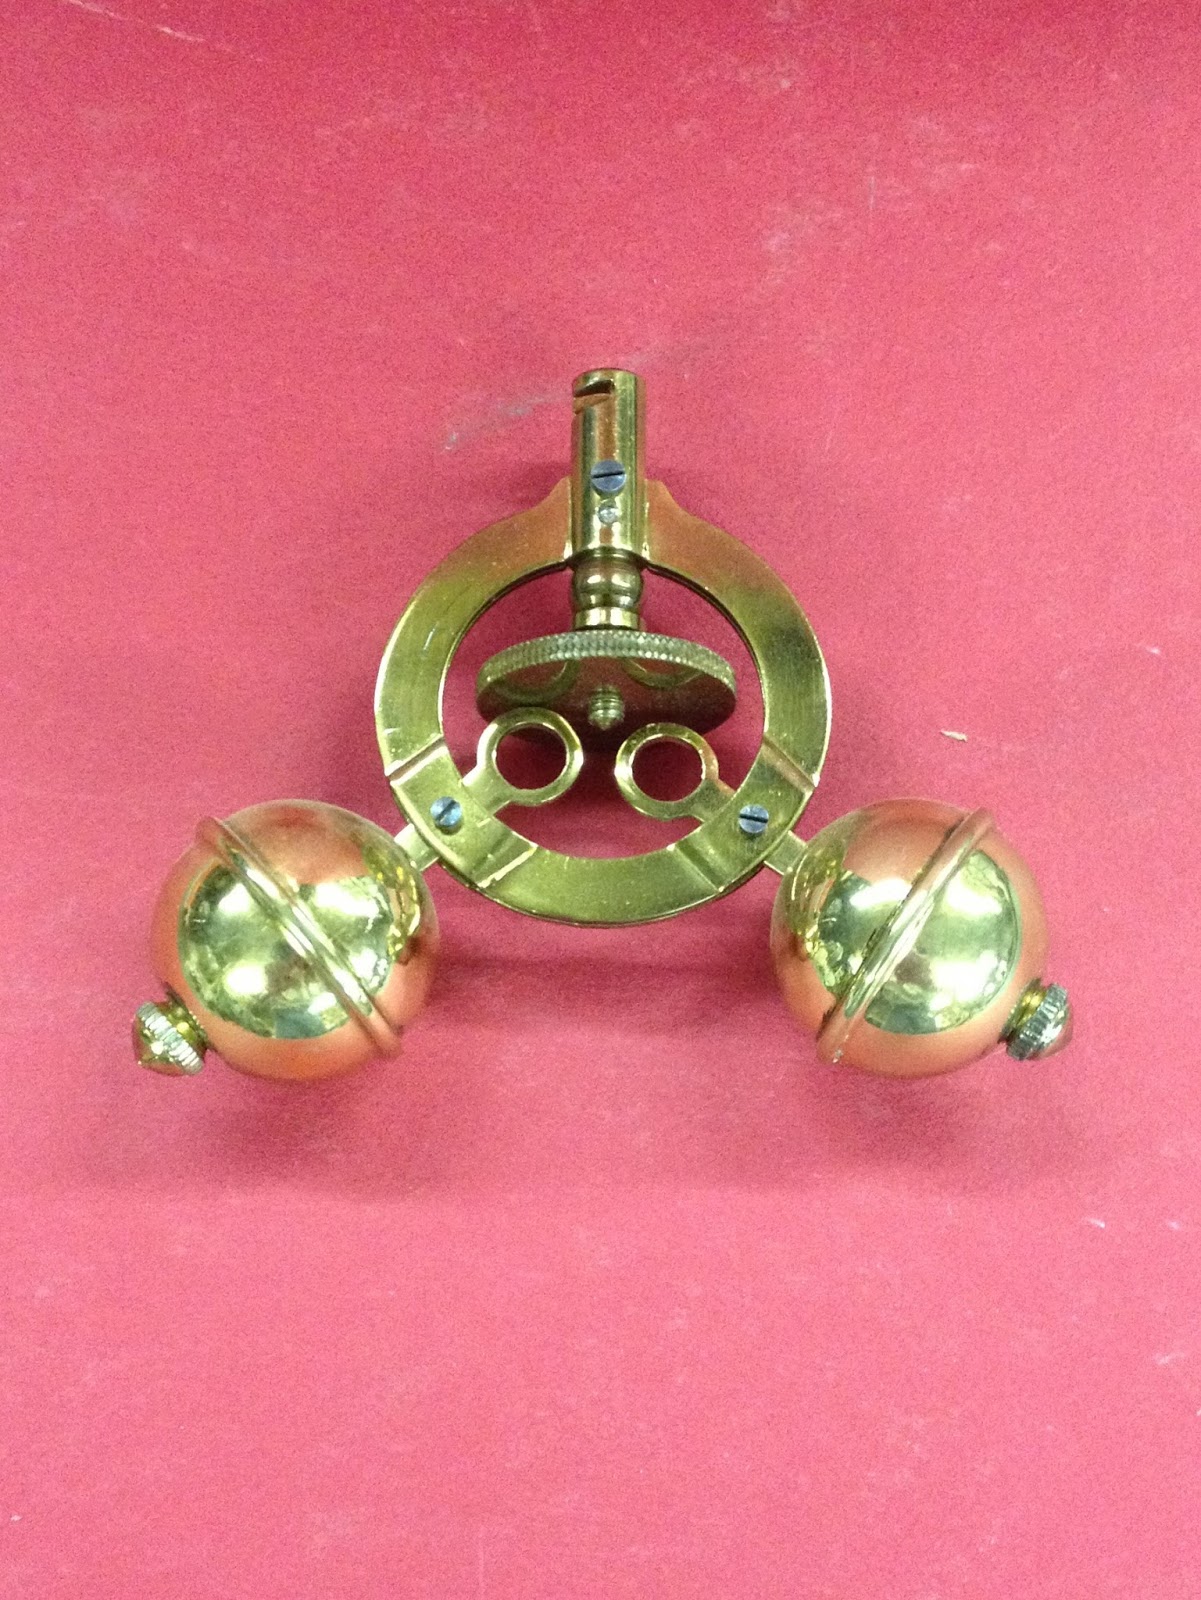
I was surprised to see how clean the pendulum stayed being wrapped in the newspaper all this time. One thing making this unique is that there are only 2 balls instead of the 4 that are on 99 percent of these things unless they are much older and they used disks.


Here is a shot of the top piece that holds the movement from above and below. You can see the nice finish on the part that has been shielded where it was screwed together.
The clock movement itself is held into the top with three screws that were pretty rusty. The heads on 2 of them also butchered up by a previous repaired that didn't know how to take care of his screwdrivers. They could probably have just been cleaned up with a scratch brush and oiled or painted, but I though bluing would be the first class way to go. The bluing will protect the screw and is quite attractive to look at. If you have an old pocketwatch, go look at the hands up close and they are probably blued. The bluing is done by getting the screw as polished as you can, and then as clean as you can, all without touching it with your fingers, and then heating it on a brass plate to a specific temperature carefully watching it as it changes color. As soon as it turns blue/purple it is quickly dumped in water to cool and instantly stop the color change If you heat a second or 2 too long or don't quench fast enough the blue turns to grey and you have to start over from the beginning.


The screw in the clock.


No comments:
Post a Comment